


Assembly Support
Find assembly instructions, video guides, troubleshooting tips, and answers to common setup questions. Everything you need to assemble and enjoy your Bush home furniture in one place.
Assembly & Troubleshooting FAQ
The QR code in the instruction sheet does not work. How can I access the assembly video?
We apologize for any inconvenience caused by the QR code not functioning as expected. We are currently working to resolve this issue. In the meantime, you can access the assembly video by navigating to the Video Library section below, where it is available for viewing.
If you need any further assistance, please don’t hesitate to reach out to our support team!
Assembly Manual Download
Contained in your box you will find the assembly manual/instructions for your furniture. Units that require multiple boxes to build the furniture will commonly be included in the box labeled Box 1. If you cannot locate, the most recent manual can be downloaded from the product page from our website. If the manual does not seem correct, contact us to assist.
To download follow the following steps.
- At the top of the home page of the website, a search bar is located in the top right corner. Search for... with an magnify glass icon.
- Enter the model number or product name.
- Select the image of the product of the manual you need.
- Scroll down to the Overview section of the product. It is midway down the page.
- Click the desired pdf document and download.
Is It Difficult to Assemble RTA Furniture?
Ready-to-Assemble (RTA) Furniture is designed with the consumer in mind, making the assembly process straightforward and manageable. Here are some key points to help you understand the assembly process and available support:
Easy-to-Follow Assembly Instructions
- Included Instructions: Each package comes with detailed assembly instructions that guide you through each step of the process. If multiple box, the instructions are usually contained in the box labeled Box 1 or A1
- Clarity: The instructions are designed to be clear and easy to understand, ensuring that you can complete the assembly without any confusion.
Consumer Service Support
In the unlikely event that you run into difficulties during the assembly process, our Consumer Service Team is here to help. Here’s how we can assist you:
- Phone Support: Call our Consumer Service Team at 800-950-4782 to speak with an Associate who can assist you with your questions.
- Email Support: You can also email us at consumerservice@esolutionsfurniture.com for support and guidance.
Tips for a Smooth Assembly Experience
- Read the Instructions: Before starting, carefully read through the entire assembly instructions to familiarize yourself with the process and components.
- Prepare Your Workspace: Ensure you have a clean and spacious area to work in, with all necessary tools on hand.
- Take Your Time: Follow each step methodically and take your time to ensure everything is assembled correctly.
- Double-Check: Periodically double-check your work against the instructions to ensure accuracy.
Additional Resources
- Online Instructions: If you misplace your assembly instructions, you can download PDF versions from our website. Simply search for your product and look for the assembly manual.
- Video Tutorials: Check our website or YouTube channel for video tutorials that provide visual guidance for assembling your furniture.
Contact Us
If you have any questions or need further assistance, please don’t hesitate to contact our Customer Care Center. We are here to help make your assembly experience as easy and enjoyable as possible.
- Customer Care Phone Number: 800-950-4782
- Email: consumerservice@esolutionsfurniture.com
Thank you for choosing our products. We strive to provide you with excellent service and support throughout your furniture assembly experience.
Note: This information is current as of 6/1/2024. Our policies and procedures are subject to change, so please check our website or contact customer service for the most up-to-date information.
Do you have any assembly tips?
Assembling RTA (Ready-to-Assemble) furniture can vary depending on the specific piece, but here are general steps to follow:
- Prepare the Area: Clear a space large enough to lay out all the parts of the furniture and ensure you have enough room to work comfortably.
- Read the Instructions: Carefully read through the assembly instructions provided by the manufacturer. Make sure you understand each step before proceeding.
- Gather Tools: Check the instructions to see what tools are required. Typically, you'll need a screwdriver, hammer, and sometimes an Allen wrench (hex key) or other specialized tools.
- Organize Parts: Group similar parts together and lay them out in an organized manner. This makes it easier to locate the pieces you need during assembly.
- Follow Step-by-Step: Begin assembling the furniture according to the instructions provided. Follow each step sequentially, ensuring parts are oriented correctly and securely fastened.
- Use Proper Hardware: Double-check that you're using the correct screws, bolts, and other hardware as specified in the instructions. Using the wrong hardware can lead to instability or damage.
- Secure Joints: Tighten all screws and bolts securely to ensure stability. Avoid over-tightening, as this can strip the threads or damage the furniture.
- Check Alignment: Periodically check the alignment of the parts as you assemble them to ensure everything is coming together correctly.
- Test Stability: Once the furniture is fully assembled, gently test its stability by applying light pressure or gently rocking it. Make any necessary adjustments to ensure it sits level and stable.
- Clean Up: Dispose of any packaging materials and clean up your workspace once the assembly is complete.
- Review Warranty: Before discarding any packaging materials, review the warranty information provided by the manufacturer in case you need to reference it later.
- Enjoy Your Furniture: Once assembled, your RTA furniture is ready to use and enjoy!
If you encounter any difficulties during assembly, refer back to the instructions or contact us for assistance.
What if there are missing or damaged parts in my order?
We strive to ensure that your furniture arrives complete and in excellent condition. However, if you encounter any missing or damaged parts, we are here to assist you promptly without the need to return the entire furniture piece.
Reporting Missing or Damaged Parts
If you discover missing or damaged parts upon receiving your order, please follow these steps:
- Identify the Part Number and Engineering Revision:
- Refer to the Assembly Instructions that came with your product. Each part should be labeled with a specific part number.
- On the lower part of the cover of the assembly instructions, there is a number starting with an "A". Provide this number to ensure that we have the proper engineering revision of the product you purchased.
- If your order consists of multiple boxes, each box may have its own assembly instructions sheet. Please provide the number specific to the box you are contacting us about.
- Contact Us:Reach out to our customer service team immediately to report the issue.You can contact us Submit a request or by phone at 1-800-950-4782.Provide the part number(s) of the missing or damaged part(s), the engineering revision number (starting with "A"), and your order details (order number, customer name, etc.).
Replacement Parts Process
Once we receive your report and necessary details:
- Free of Charge: We will promptly send you the required replacement parts free of charge.
- Quick Resolution: Our goal is to ensure that you receive the missing or damaged parts as quickly as possible so you can complete the assembly of your furniture.
No Need to Return the Furniture
There’s no need to return the entire furniture piece to the retailer if only parts are missing or damaged. We handle the issue directly by sending you the necessary replacement parts.
Contact Us
If you have any questions or need assistance regarding missing or damaged parts, please don’t hesitate to contact our customer service team. We are here to help and ensure your satisfaction with your purchase.
- Customer Service: Submit a request
- Customer Service Phone Number: 1-800-950-4782
Thank you for choosing our products. We appreciate your understanding and cooperation in resolving any issues that may arise.
Note: This information is current as of 6/1/2024. Our policies and procedures are subject to change, so please check our website or contact customer service for the most up-to-date information.
How to Identify Hardware Parts Without Labels
When assembling furniture, correctly identifying hardware parts is crucial for smooth assembly and ensuring structural integrity. Here’s a guide to help you identify the correct screws, nuts, and bolts when they are not labeled:
Using the Assembly Instructions
- Consult the Assembly Instructions: The Assembly Instruction book typically includes detailed diagrams or illustrations of each hardware part required for assembly.
- Scale Drawings: All nuts, bolts, and screws in the Assembly Instruction book are drawn to scale. This means that the size and shape of each piece in the diagram match its actual physical dimensions.
- Match Against Diagrams:Take a piece of the enclosed hardware (nut, bolt, screw) and hold it up against the corresponding picture in the Instructions.Compare the physical hardware to the diagram in terms of shape and size.The correct hardware part should match the drawing in both shape and size, helping you easily identify each piece.
- Use of Scale: Ensure the hardware part matches the scale drawing in the Instructions accurately. This method allows for quick identification and ensures you select the correct piece for each step of assembly.
Additional Tips for Identification
- Organize Hardware: Before starting assembly, organize all hardware parts into separate groups (screws, bolts, nuts) according to their sizes and types.
- Double-Check: If uncertain, double-check the shape and size of the hardware against the Assembly Instructions before proceeding.
- Count and Verify: Count all hardware pieces before assembly to ensure none are missing. Refer to the quantity listed in the Assembly Instructions.
When Labels Are Missing
If hardware parts are not labeled, following the above steps using the Assembly Instructions should effectively help you identify each piece needed for assembly.
Contact Us for Assistance
If you encounter difficulties identifying hardware parts or have questions during the assembly process, please contact our Consumer Service Team:
- Consumer Service Phone Number: 800-950-4782
- Email: consumerservice@esolutionsfurniture.com
We are dedicated to ensuring your assembly experience is smooth and successful.
Note: This information is current as of 6/1/2024. For the most up-to-date information or specific questions about your product, please contact our Consumer Service Team or refer to our website.
How to Adjust Door Hinges
Watch our step-by-step instruction video to help you adjust the door hinges.
Adjusting door hinges is essential for ensuring proper alignment and functionality of cabinet doors. Here’s a step-by-step guide to help you adjust door hinges effectively:
Tools You May Need
Before starting, gather the following tools:
- Phillips screwdriver
- Flathead screwdriver
- Measuring tape (optional)
- Pencil (optional)
Step-by-Step Adjustment Process
- Identify Hinge Type:Determine the type of hinges used on your cabinet doors. Common types include concealed hinges or surface-mounted hinges.
- Locate Adjustment Screws:Most hinges have adjustment screws that control door position. These screws are typically located on the hinge itself or the mounting plate attached to the cabinet.
- Vertical Adjustment (Height):To adjust the height of the door, locate the vertical adjustment screw on the hinge. Turn the screw clockwise to raise the door or counterclockwise to lower it.Make small adjustments at a time and check the door alignment after each adjustment.
- Horizontal Adjustment (Side-to-Side):If the door needs to move closer or farther from the cabinet frame, adjust the horizontal screws on the hinge.For concealed hinges, these screws are often located at the sides of the hinge. For surface-mounted hinges, the screws are typically on the mounting plate.Turn the adjustment screws to move the door left or right as needed.
- Depth Adjustment (In-Out):Some hinges allow you to adjust the depth of the door relative to the cabinet frame. This adjustment ensures the door closes flush with the frame.Locate the depth adjustment screw on the hinge or mounting plate and adjust as necessary.
- Check Alignment:After making adjustments, close the door and check for proper alignment. The door should close smoothly without rubbing against the cabinet frame or adjacent doors.Use a measuring tape or visually inspect gaps between the door and frame to ensure uniformity.
- Tighten Screws Securely:Once satisfied with the door alignment, tighten all adjustment screws securely to prevent future movement.
Tips for Successful Adjustment
- Patience: Adjust hinges gradually to avoid over-adjustment, which can affect door alignment.
- Symmetrical Adjustment: Ensure both hinges on the door are adjusted evenly to maintain balanced alignment.
- Review Instructions: Refer to specific assembly instructions provided by the manufacturer for detailed hinge adjustment guidelines.
Contact Us for Assistance
If you encounter difficulties adjusting door hinges or have specific questions about your product’s hinges, please contact our Consumer Service Team:
- Consumer Service Phone Number: 800-950-4782
- Email: consumerservice@esolutionsfurniture.com
We are here to assist you with any inquiries and ensure your furniture functions perfectly.
Note: This information is current as of 6/1/2024. For the latest updates or specific inquiries about your product, please contact our Consumer Service Team or visit our website.
How Do I Adjust the Drawer Fronts?
Watch our step-by-step instruction video to help you adjust the drawer fronts.
Adjusting the drawer fronts ensures they align perfectly and operate smoothly. Follow these steps to make the necessary adjustments:
Steps to Adjust Drawer Fronts
- Locate Adjustment Screws:Open the drawer to locate the adjustment screws on the side of the drawer slides.
- Adjustment:To adjust the drawer front, loosen the screws on the side of the drawer slightly.Move the drawer front up or down, or left to right, to the desired position.Tighten the screws to secure the new position.
Tips for Accurate Adjustment
- Make Small Adjustments: Small, incremental adjustments can help achieve the perfect alignment without overcorrecting.
- Check Alignment Regularly: After each adjustment, close the drawer and check the alignment to ensure it is correct.
- Use a Level: For precise vertical alignment, use a level to ensure the drawer front is perfectly horizontal.
Contact Us for Assistance
If you encounter any difficulties or have specific questions about adjusting your drawer fronts, please contact our Consumer Service Team:
- Consumer Service Phone Number: 800-950-4782
- Email: consumerservice@esolutionsfurniture.com
We are here to help you with any inquiries and ensure your furniture functions perfectly.
Note: This information is current as of 6/1/2024. For the latest updates or specific inquiries about your product, please contact our Consumer Service Team or visit our website.
How Do I Separate and Install Drawer Slides?
Watch our step-by-step instruction video to help you separate and install the drawer slides.
Installing drawer slides correctly is essential for smooth operation and stability in your furniture. Here’s a step-by-step guide to help you separate and install drawer slides effectively:
Separating Drawer Slides
- Identify the Drawer Slides: Drawer slides typically come in pairs—one for the left side (usually marked with "L" or "CL") and one for the right side (marked with "R" or "CR"). Ensure you have both slides ready for installation.
- Locate Release Mechanism: Most drawer slides have a release mechanism that allows you to separate the slide components. Look for tabs or levers on the slides near the drawer release clips.
- Activate Release Mechanism: To separate the slides, lift up on the right side and push down on the left side to activate the release mechanism. This may involve pressing down on a tab or lever while gently pulling the drawer slide components apart.
- Separate the Slides: Once the release mechanism is activated, carefully pull the drawer slides apart. Ensure you keep the slides aligned to prevent damage or misalignment.
Installing Drawer Slides
- Prepare the Drawer and Cabinet:Position the drawer on a flat surface, ensuring it is oriented correctly with the front facing upward.Position the cabinet or furniture unit where the drawer will be installed.
- Align and Position Slides:Identify the left and right slides according to the markings (CL/CR for cabinet and DL/DR for drawer).Position the left slide (CL or DL) on the left side of the drawer and the right slide (CR or DR) on the right side.
- Mount Slides on Drawer:Position the drawer slide flush with the front edge of the drawer side.Use screws provided to secure the slides to the drawer. Ensure the slides are level and straight.
- Mount Slides in Cabinet:Position the cabinet slide flush with the front edge of the cabinet side.Use screws provided to secure the slides to the cabinet. Ensure the slides are level and aligned with the drawer slides.
- Test Drawer Movement:Slide the drawer into the cabinet to test movement and alignment.Ensure the drawer slides smoothly and closes completely without obstruction.
- Adjust if Necessary:If the drawer does not slide smoothly or aligns incorrectly, adjust the position of the slides or screws accordingly.
- Securely Fasten:Once satisfied with the alignment and movement, securely tighten all screws to ensure the slides are firmly in place.
Tips for Installation:
- Follow Manufacturer Instructions: Always refer to the specific assembly instructions provided by the manufacturer for your furniture model.
- Check for Smooth Operation: Ensure the drawer slides smoothly and without resistance before finalizing installation.
- Double-Check Alignment: Proper alignment of the drawer slides is crucial for stability and functionality.
When to Seek Assistance:
If you encounter difficulties during the separation or installation process of drawer slides, or if you have any questions, please contact our Consumer Service Team for assistance:
- Consumer Service Phone Number: 800-950-4782
- Email: consumerservice@esolutionsfurniture.com
We are here to help ensure your furniture assembly experience is successful and satisfying.
Note: This information is current as of 6/1/2024. Our policies and procedures are subject to change, so please check our website or contact customer service for the most up-to-date information.
How Do You Tell the Slides Apart and Put Them on Correctly?
Identifying the Slides
Most slides have tiny letters embossed on them - the letters are CL, CR, DR, and DL. Understanding these letters is crucial for correctly mounting the slides.
What the Letters Mean
- C: Stands for Cabinet (the unit itself).
- D: Stands for Drawer.
- L: Stands for Left.
- R: Stands for Right.
Mounting the Slides Correctly
For the Cabinet (C):
- CL Slide: Should be mounted on the left-hand side of the unit as you face the unit.
- CR Slide: Should be mounted on the right-hand side of the unit as you face the unit.
For the Drawer (D):
- DL Slide: Should be mounted on the left-hand side of the drawer as you face the handle/front of the drawer.
- DR Slide: Should be mounted on the right-hand side of the drawer as you face the handle/front of the drawer.
Special Notes
- Roller Slides vs. Ball-Bearing Slides: The above lettering system usually only applies to roller slides, not ball-bearing slides. For ball-bearing slides, refer to the specific instructions provided in the assembly manual.
- Double-Check Instructions: Always double-check the assembly instructions provided with your product to ensure proper installation.
Additional Tips
- Orientation Matters: Pay close attention to the orientation of the slides. Incorrect mounting can result in drawers that do not open or close properly.
- Follow Steps Carefully: Carefully follow each step in the assembly instructions to avoid mistakes.
When to Contact Support
If you encounter any difficulties or have questions about mounting the slides, please contact our Consumer Service Team for assistance. We are here to help ensure your assembly process is smooth and successful.
- Consumer Service Phone Number: 800-950-4782
- Email: consumerservice@esolutionsfurniture.com
Thank you for choosing our products. We strive to provide excellent service and support throughout your furniture assembly experience.
Note: This information is current as of 8/7/2024. Our policies and procedures are subject to change, so please check our website or contact customer service for the most up-to-date information.
How to Remove Stickers from Laminate Furniture
Removing stickers from laminate furniture can be done effectively with the right techniques. Follow these steps to remove stickers without damaging the surface:
Steps to Remove Stickers
- Warm Up the Adhesive:Rub your palm repeatedly in a clockwise direction over the sticker to warm up the adhesive.Alternatively, use a hairdryer to gently heat the sticker residue. Hold the hairdryer a few inches away and move it back and forth for a few seconds.
- Peel Off Sticker:Carefully peel off as much of the sticker as possible using your fingers or a plastic scraper. Avoid using metal tools to prevent scratching the laminate surface
- Remove Sticker Residue:Use your fingernail or a rubber scraper to remove the warmed adhesive. Do not use metal tools.Gently rub the residue in a circular motion until it starts to lift off.If residue remains, wipe the area with a clean, damp cloth to remove any leftover residue.Dry the area with a soft, dry cloth.
Tips for Effective Removal
- Avoid Harsh Chemicals: Do not use harsh chemicals or abrasive materials, as they can damage the laminate surface.
- Be Patient: Removing adhesive residue may take a few attempts. Be patient and gentle to avoid damaging the furniture.
Important Note
- Safety Stickers: Some safety stickers are not designed to be removed. They must remain in place to ensure safety and compliance with product guidelines.
Contact Us for Assistance
If you have any questions or need further assistance, please contact our Consumer Service Team:
- Consumer Service Phone Number: 800-950-4782
- Email: consumerservice@esolutionsfurniture.com
We are here to help with any inquiries you may have.
Note: This information is current as of 6/1/2024. For the latest updates or specific inquiries about your product, please contact our Consumer Service Team or visit our website.
How do I tighten the KD Cams?
Watch our step-by-step instruction video to help you properly Tighten the KD Cams.
KD cams (Knock Down cams) are essential components used in furniture assembly to securely join pieces of wood. Properly tightening KD cams ensures a stable and durable assembly. Follow the steps below to correctly tighten KD cams:
1. Understand the Assembly Components: KD cams typically consist of two main parts: a washer/cam and a rod/bolt. These components work together to clamp and hold pieces of wood firmly in place.
2. Insert the Rod/Bolt:
- Begin by inserting the rod or bolt into the designated hole in one piece of wood. Ensure it is positioned correctly for alignment with the KD cam.
3. Place and Align the KD Cam:
- Insert the KD cam into the corresponding hole on the adjacent piece of wood. The opening in the KD cam should align perfectly with the rod or bolt inserted in step 2.
4. Tightening the KD Cam:
- Use a flathead screwdriver to tighten the KD cam. Insert the screwdriver into the slot on the washer/cam.
- Begin turning the KD cam clockwise. Gradually increase the pressure as you turn to ensure a snug fit.
- Rotate the KD cam to approximately the 2 o’clock position. This position helps in securely clamping the pieces of wood together.
5. Applying Final Pressure:
- To ensure the KD cam is properly tightened, apply a little additional pressure once it reaches the 2 o’clock position. This step ensures that the joint is firmly held together without over-tightening, which could potentially damage the cam or the wood.
Additional Tips:
- Avoid Over-Tightening: Excessive force when tightening the KD cam can lead to damage. Apply firm pressure gradually and check the stability of the joint periodically.
- Check Alignment: Before final tightening, ensure that all parts are aligned correctly. Misalignment can affect the stability and appearance of the assembled furniture.
Troubleshooting:
- Looseness: If you notice that the joint feels loose after tightening, double-check the alignment and consider re-tightening the KD cam with slightly more pressure.
- Damage to Cam or Wood: If the KD cam or the wood shows signs of damage during assembly, please contact our Consumer Service Team for assistance.
Contact Us for Assistance: If you have any questions or need further assistance, please contact our Consumer Service Team:
- Consumer Service Phone Number: 800-950-4782
- Email: consumerservice@esolutionsfurniture.com
By following these steps and tips, you can effectively tighten KD cams during furniture assembly, ensuring a secure and professional finish. If you have any further questions or encounter difficulties, don’t hesitate to consult the assembly instructions provided with your furniture or contact our consumer service team for assistance.
Note: This information is current as of 8/7/2024. For the latest updates or specific inquiries about your product, please contact our Consumer Service Team or visit our website.
Can I Use Glue to Construct a Piece of Furniture?
When assembling furniture, it's important to follow the provided assembly instructions for optimal construction and to maintain warranty coverage. Here’s what you need to know about using glue:
Guidelines for Using Glue
- Assembly Instructions: If glue is not mentioned in the assembly instructions, it is not required for assembling the furniture. The manufacturer designs the assembly process to ensure stability and functionality without additional adhesive.
- When Glue Is Included: Some assembly kits may include a bottle of glue in the packaging. If the instructions specify the use of glue, it is crucial to follow these guidelines. The glue provided is designed to enhance structural integrity at specific joints or connections.
- Strict Adherence to Instructions: If instructed to use glue, strictly adhere to the provided type and application instructions. Using a different type of glue may not only compromise the assembly but could also hinder disassembly if needed in the future.
Warranty Implications
- Effect on Warranty: Using unauthorized adhesive or deviating from the provided assembly instructions, including the use of glue when not specified, may void the product warranty. The warranty typically covers defects under normal use and assembly as per the manufacturer’s guidelines.
Proper Use of Glue
- Follow Manufacturer Recommendations: Always follow the assembly instructions provided by the manufacturer. If glue is included, use it as directed to ensure proper assembly and structural integrity.
- Contact Consumer Service: For clarification on the use of glue or any questions regarding assembly instructions, please contact our Consumer Service Team:
Consumer Service Phone Number: 800-950-4782
Email: consumerservice@esolutionsfurniture.com
Conclusion
Using glue in furniture assembly should be done strictly according to manufacturer instructions. This ensures the furniture's stability, maintains warranty coverage, and prevents potential issues during assembly and use.
Note: This information is current as of 6/1/2024. For the latest updates or specific inquiries about your product, please contact our Consumer Service Team or visit our website.
How to Attach Wall Mounted Cabinets to a Wall
Attaching wall cabinets securely to a wall is crucial for stability and safety. This guide outlines the steps for installing wall cabinets when anchor screws are not supplied by the manufacturer. Please note, for safety reasons, it's recommended that installation be performed by a professional or someone experienced in handling such tasks.
1. Gather Necessary Tools and Materials: Before beginning the installation, gather the following tools and materials:
- Electric drill
- Screwdriver (preferably electric or cordless)
- Level
- Pencil
- Measuring tape
- Stud finder
- Anchors and screws suitable for your wall type (if not supplied by the manufacturer)
- Cabinet mounting screws (if not supplied by the manufacturer)
2. Prepare the Installation Area:
- Clear the installation area of any obstructions.
- Ensure the wall surface is clean and free from debris.
3. Locate and Mark Wall Studs:
- Use a stud finder to locate the studs in the wall where the cabinets will be mounted.
- Mark the stud locations with a pencil. Wall studs provide the strongest support for mounting cabinets.
4. Determine Cabinet Placement:
- Measure and mark the height at which the cabinets will be installed.
- Use a level to ensure the markings are straight and level across the wall.
5. Install Mounting Screws or Anchors:
- For Wooden Studs:Drill pilot holes into the wall studs at the marked locations using an appropriately sized drill bit.Insert mounting screws through the cabinet back and into the pilot holes. Use a screwdriver to tighten securely.
- For Drywall or Plasterboard:If anchor screws are not supplied by the manufacturer, select appropriate wall anchors based on your wall type (e.g., toggle bolts, molly bolts).Drill pilot holes into the drywall or plasterboard at the marked stud locations.Insert the anchors into the pilot holes.Securely attach the cabinet mounting screws into the anchors using a screwdriver or electric screwdriver.
6. Securely Attach the Cabinets:
- Lift the cabinet into position and align it with the mounting screws or anchors.
- Carefully lower the cabinet onto the screws or anchors.
- Double-check alignment and use a level to ensure the cabinet is straight and level.
7. Final Adjustments:
- Tighten all screws securely to ensure the cabinet is firmly attached to the wall.
- Check for any gaps between the cabinet and the wall.
8. Professional Installation Recommendation:
- Due to the importance of ensuring cabinets are securely attached and level, it is recommended that installation be performed by a professional or someone experienced in handling such tasks.
- Professionals have the expertise and tools to ensure cabinets are mounted safely and securely, minimizing the risk of accidents or damage.
Contact Us for Consumer Services: If you have any questions regarding specific installation methods, require guidance on using anchor screws, or need assistance with your wall cabinet installation, please contact our Consumer Services Team:
- Consumer Service Phone Number: 800-950-4782
- Email: consumerservice@esolutionsfurniture.com
Our dedicated team is available to assist you with any inquiries you may have about installing our products safely and effectively. For further information or additional support, feel free to reach out to us. We are committed to ensuring your satisfaction and successful installation of your wall cabinets.
Note: This guide assumes typical installation scenarios. Always follow specific instructions provided by the cabinet manufacturer for your particular model and consult professional help as needed.
Note: This information is current as of 6/1/2024. For the latest updates or specific inquiries about your product, please contact our Consumer Service Team or visit our website.
How to Use the USB Hub
Watch our helpful instruction video to learn how to properly use the USB Port.
Overview
Our USB hub is designed for charging devices and connecting peripherals to your computer. Here’s a guide to help you use it effectively:
Features
- Computer Connection: The USB hub must be plugged into your computer. It does not require a wall outlet.
- Charging Capability: It can charge devices but does not support wall power for direct charging.
- Compatibility: This USB hub is not compatible with USB 3.0.
Steps to Use the USB Hub
- Connect to Computer:Plug the USB hub into an available USB port on your computer.Ensure it is securely connected to establish a proper connection.
- Connect Your Devices:Plug your devices (e.g., phones, tablets, USB drives) into the available ports on the hub.
- Verify Operation:Confirm that the connected devices are charging correctly.
Troubleshooting Tips
- No Power: Ensure the USB hub is securely connected to the computer.
- Device Not Recognized: Check that the USB port on the computer and the hub are functioning.
- Slow Charging: The charging speed may vary based on the power output of the computer’s USB port.
Contact Us for Assistance
If you encounter difficulties using the USB hub or have specific questions, please contact our Consumer Service Team:
- Consumer Service Phone Number: 800-950-4782
- Email: consumerservice@esolutionsfurniture.com
We are here to assist you with any inquiries and ensure your USB hub functions perfectly.
Note: This information is current as of 8/7/2024. For the latest updates or specific inquiries about your product, please contact our Consumer Service Team or visit our website.
Can I Put Casters on the Unit I Purchased or Modify It in Any Way?
Modifying furniture, such as adding casters (wheels), can impact its safety and functionality. Here’s what you need to know before making any modifications:
Adding Casters
- Safety Concerns: If the unit does not come with casters originally, it is unsafe to add them. This modification can alter the unit's "tip stability factor," potentially increasing the risk of tipping over. This poses a danger to individuals, pets, and any items placed on or inside the unit.
- Risk of Tipping: Adding casters may compromise the stability and balance of the furniture. Furniture is designed and tested for stability in its original configuration. Any alteration, such as adding casters, can disrupt this balance and increase the likelihood of tipping.
Warranty Implications
- Voiding the Warranty: Modifying the furniture, including adding casters, voids the manufacturer's warranty. Warranty coverage typically applies to the product in its original, unmodified state. By altering the unit, you assume responsibility for any resulting issues or hazards.
- Liability Absolution: Adding casters or making other modifications absolves the company from liability for accidents, injuries, or damages caused by the modified product. The warranty is no longer valid for such alterations.
Alternative Solutions
- Consider Manufacturer Recommendations: If mobility is desired, consider furniture units designed to accommodate casters. Many products are available with integrated caster options that maintain safety and stability.
- Consult with Manufacturer: If unsure about modifications or seeking alternative solutions, contact our Consumer Service Team for guidance. We can provide recommendations or alternative products designed to meet your needs safely.
Contact Us for Assistance
For questions regarding modifications, safety concerns, or warranty implications, please contact our Consumer Service Team:
- Consumer Service Phone Number: 800-950-4782
- Email: consumerservice@esolutionsfurniture.com
We are committed to ensuring your safety and satisfaction with our products.
Note: This information is current as of 8/7/2024. For the latest information or specific inquiries about your product, please contact our Consumer Service Team or visit our website.
I Have Attached Two Boards to Each Other, But When They Stand by Themselves the Boards Seem Wobbly. Is This Normal?
Understanding the Assembly Process
It is perfectly normal for two boards standing alone to be wobbly during the initial stages of assembly. Here’s why this happens and what to expect as you continue building your furniture:
Why the Boards Are Wobbly
- Partial Assembly: When only two boards are attached, the structure lacks the additional support provided by the rest of the components. This results in a temporary lack of stability.
- Incomplete Frame: The boards will not be securely locked into place until the entire frame, including all supporting components, is fully assembled.
Ensuring Stability
- Complete the Frame: The wobbliness will resolve once you have the entire frame assembled. Each component, including side panels, shelves, and the back panel (if applicable), contributes to the overall stability and strength of the furniture.
- Follow Instructions: Carefully follow the assembly instructions provided in your package to ensure that all parts are correctly and securely attached.
Importance of the Back Panel
- Added Stability: If your furniture includes a back panel, it is crucial to install it as it significantly enhances the structural integrity and stability of the unit.
- Final Lock-In: The back panel helps lock the entire frame into place, ensuring that the boards are securely held together and eliminating any wobbliness.
Additional Tips
- Work on a Flat Surface: Assemble your furniture on a flat, stable surface to prevent any additional wobbliness during the assembly process.
- Double-Check Connections: Ensure all fasteners and connectors are properly tightened and secured as you progress through the assembly steps.
When to Contact Support
If the wobbliness persists even after completing the assembly, please contact our Consumer Service Team for further assistance. Our team can provide guidance and ensure your furniture is correctly assembled and stable.
- Consumer Service Phone Number: 800-950-4782
- Email: consumerservice@esolutionsfurniture.com
Thank you for choosing our products. We are here to help and ensure you have a positive assembly experience.
Note: This information is current as of 6/1/2024. Our policies and procedures are subject to change, so please check our website or contact customer service for the most up-to-date information.
The Hole Around the Fastener Bolt is Flaking. Is This Normal?
Understanding Flaking Around Fastener Holes
It's common for some flaking to happen around the hole when fastening the bolt. This is a normal occurrence and is part of the design to ensure a secure fit. Here’s why it happens and how to handle it:
Why Flaking Occurs
- Tight Grip: The hole is intentionally slightly smaller than the bolt to ensure a tight grip. This tight fit provides structural integrity and stability to the assembled furniture.
- Material Properties: The materials used in the furniture, such as particleboard or MDF, can cause some surface flaking when a bolt is inserted.
Tips for Smooth Fastening
If you find the insertion of the bolt difficult, you can use a simple trick to make the process easier:
- Liquid Soap: Apply a few drops of liquid soap on the bolt threads or around the hole. This can facilitate smoother placement and reduce the resistance when screwing in the bolt.
Additional Tips
- Use Proper Tools: Ensure you are using the correct tools, such as the provided Allen wrench or a suitable screwdriver, to avoid damaging the bolt or the hole.
- Gentle Pressure: Apply gentle, even pressure when inserting the bolt to minimize flaking and ensure a snug fit.
When to Contact Support
If you experience excessive flaking or difficulty that seems abnormal, please contact our Customer Care Center for further assistance. Our team can provide guidance and ensure your assembly process is smooth and successful.
- Customer Care Phone Number: 800-950-4782
- Email: consumerservice@esolutionsfurniture.com
Thank you for choosing our products. We are here to help and ensure you have a positive assembly experience.
Note: This information is current as of 6/1/2024. Our policies and procedures are subject to change, so please check our website or contact customer service for the most up-to-date information.
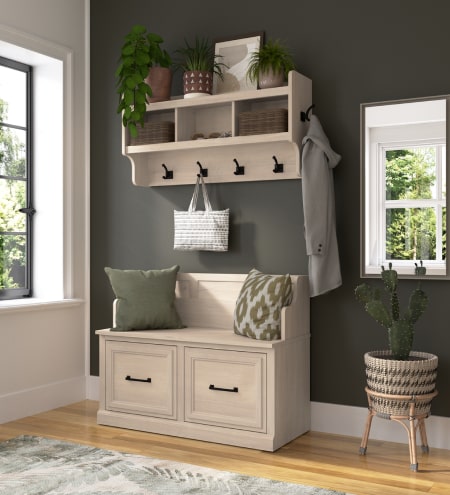
How does the Hall Tree Top Attach to the Bench Base?
To attach the Hall Tree Top to the Bench Base, refer to the Base instruction sheet towards the back. The product is designed to be versatile, serving as a standalone bench or paired with the hall tree top. The bench's surface will remain complete, while underneath, pilot holes facilitate screw penetration into the upper unit, ensuring a clean surface when not paired.
To prepare for attachment, remove the base top from the unit. Underneath, pilot holes are drilled but not fully through the finish. Insert a screw from the bottom to penetrate the top finish. Remove the screw, then insert it from the top to clear the attachment hole (refer to image). Repeat for all attachment points. Attach the base top to the hall tree top and proceed with the remaining steps of the instructions.
Are the Back Panels on Your Furniture Necessary?
Importance of Back Panels
Absolutely! The back panel of a unit serves dual purposes: maintaining its square shape and preventing the collapse of its sides. While it may appear merely aesthetic, it significantly enhances structural integrity and safety.
Structural Integrity
- Stability: The back panel helps keep the unit stable by maintaining its square shape, preventing any leaning or skewing that can occur without it.
- Support: It provides essential support to the sides of the furniture, ensuring that the overall structure remains strong and durable.
Safety
- Prevents Collapse: By securing the sides, the back panel prevents the furniture from collapsing or becoming unstable, which is crucial for the safety of the users.
- Load Distribution: It helps in evenly distributing the load across the furniture, reducing the risk of damage underweight.
Visual Appeal
- Finished Look: The back panel contributes to the overall finished look of the furniture, covering up any internal components and giving the unit a polished appearance.
- Hides Cables and Wires: It can also help in organizing and hiding cables or wires, contributing to a cleaner and more organized look.
Conclusion
Ensuring the presence of the back panel is crucial for both visual appeal and functional strength. It is not just a decorative element but an essential component that significantly enhances the structural integrity and safety of the furniture. Always install the back panel as per the assembly instructions to maintain the durability and stability of your furniture.
If you have any questions or need further assistance, please don't hesitate to contact our Customer Care Associates.
- Customer Care Phone Number: 800-950-4782
- Email: consumerservice@esolutionsfurniture.com
Thank you for choosing our products. We strive to provide excellent service and support throughout your furniture assembly and usage experience.
Note: This information is current as of 6/1/2024. Our policies and procedures are subject to change, so please check our website or contact customer service for the most up-to-date information.
Do You Assemble the Furniture?
No, we do not assemble the furniture. Thank you for reaching out and requesting a referral for a furniture assembly service provider. We have compiled a list of service providers in your area, which you can find below. Please note that this list is for your reference only, and we do not endorse or guarantee the quality of their work. Payment for the service will be arranged directly between you and the chosen service provider. Alternatively, you can conduct an internet search to find a suitable provider.
Recommended Assembly Service Providers
- Apollo Retail Phone: 800-978-2669
Service Area: Lower 48 States - USA - National Assembly Service (NAS) Phone: 877-915-5505Service Area: Lower 48 States - USA
- East Coast Assembly Phone: 877-380-8695
Service Area: Limited contact for service coverage - (FL, GA, KY, MA, NY, OH, WV) - Installnet Phone: 410-721-9301.
Website: Lower 48 States - USA, some Canada
Tips for Choosing a Furniture Assembly Service Provider
It's important to do some research and due diligence before choosing a service provider to ensure they meet your specific needs and expectations. Here are a few tips to consider:
- Check Reviews: Look for online reviews and ratings of the service providers you're considering. This can give you a sense of their reputation and the quality of their work.
- Ask for Recommendations: If possible, ask friends, family, or colleagues if they have any recommendations for reliable furniture assemblers.
- Request Quotes: Contact the service providers on your list and request quotes or estimates for the specific assembly job you need. This will help you compare prices.
- Insurance and Licensing: Ensure that the service provider has the necessary insurance and any required licenses to operate in your area.
- Experience: Inquire about the experience and expertise of the assemblers. Some assembly jobs may require specialized knowledge.
- Availability: Check if they are available when you need the service, and if they can meet your scheduling requirements.
- Communication: Clear communication is essential. Make sure you can easily contact the service provider to discuss your needs and any concerns.
- Contract or Agreement: Once you've chosen a provider, it's a good idea to have a written agreement or contract that outlines the scope of work, cost, and any other important terms.
By taking these steps, you can increase the likelihood of finding a reliable and skilled furniture assembly service provider that meets your needs and expectations. Good luck with your furniture assembly project!
Contact Us
If you have any further questions or need additional assistance, please feel free to contact our Customer Care Associates.
- Customer Care Phone Number: 800-950-4782
- Email: consumerservice@esolutionsfurniture.com
Thank you for choosing our products. We strive to provide excellent service and support throughout your furniture assembly experience.
Note: This information is current as of 6/1/2024. Our policies and procedures are subject to change, so please check our website or contact customer service for the most up-to-date information.
Can You Recommend an Assembler in My Area?
If you're looking for assistance with assembling your furniture, we recommend exploring professional assembly companies that specialize in furniture installation. Here are some options to consider:
National Assembly Companies
- Apollo RetailPhone: 800-978-2669Service Area: Lower 48 States - USA
- National Assembly Service (NAS)Phone: 877-915-5505
Service Area: Lower 48 States - USA - East Coast Assembly Phone: 877-380-8695
Service Area: Limited contact for service coverage - (FL, GA, KY, MA, NY, OH, WV) - Installnet Phone: 410-721-9301.
Website: Lower 48 States - USA, some Canada
Finding Local Assembly Services
If you prefer a local assembly service provider, we recommend conducting an internet search for assembly companies in your area.
Tips for Choosing a Furniture Assembly Service Provider
When selecting a furniture assembly service provider, it's important to do some research and due diligence to ensure they meet your specific needs and expectations. Here are a few tips to consider:
- Check Reviews: Look for online reviews and ratings of the service providers you're considering. This can give you insight into their reputation and the quality of their work.
- Ask for Recommendations: Seek recommendations from friends, family, or colleagues who have used furniture assemblers in the past.
- Request Quotes: Contact the service providers and request quotes or estimates for the specific assembly job you need. This will help you compare prices and services.
- Insurance and Licensing: Ensure that the service provider is properly insured and licensed to operate in your area.
- Experience: Inquire about the experience and expertise of the assemblers, especially for any specialized assembly requirements.
- Availability: Check if the service provider is available when you need them and if they can accommodate your scheduling needs.
- Communication: Clear communication is crucial. Ensure that you can easily reach the service provider to discuss your needs and any concerns.
- Contract or Agreement: Once you've chosen a provider, establish a written agreement or contract that outlines the scope of work, cost, and any other important terms.
Note on Assembly Costs
Please note that assembly costs are not covered by the Bush Warranty. When hiring an assembly service provider, you will be responsible for any associated costs.
By following these steps, you can increase the likelihood of finding a reliable and skilled furniture assembly service provider that meets your expectations. Good luck with your furniture assembly project!
Contact Us
For further assistance or if you have any questions regarding assembly services, please contact our Customer Care Associates. We are here to help ensure your satisfaction with your furniture purchase.
- Customer Care Associates Phone Number: 800-950-4782
Thank you for choosing our products. We strive to provide excellent service and support throughout your furniture ownership experience.
Note: This information is current as of 6/1/2024. Service provider recommendations and tips may vary over time, so please check the provided contact information or contact customer service for the most up-to-date recommendations.
Missing Cushions for Sofa or Upholstery?
When preparing for assembly, locate the cushions of a sofa or other upholstery products inside the base. Flip the base over and unzip the dust guard to access the stored cushions.
How do I attach the components of my upholstered furniture?
Watch our step-by-step instruction video to help you attach the components of your upholstered furniture.
How do I attach the upholstered chaise brackets?
Watch our step-by-step instruction video to help you attach the chaise brackets.
How do I secure the backrest on my upholstered furniture?
Watch our step-by-step instruction video to help you secure the backrest.
How to Assemble and Expand Air Compressed Packed Cushions for Your Upholstered Furniture
Watch our step-by-step instruction video to help you assemble the back and seat cushions.
Assembling and allowing air compressed packed cushions to expand is crucial for achieving optimal comfort and appearance in your upholstered furniture. This process ensures that the cushions regain their intended shape and firmness after being vacuum-sealed for shipping or storage. Follow these steps to properly assemble, insert into covers, and allow for the expansion of your cushions over a period of 3-4 days:
Materials Needed
- Upholstered furniture frame
- Cushion covers
- Air compressed packed cushions (seat and back cushions)
- Scissors or utility knife (for unpacking)
- Well-ventilated space
Steps to Assemble, Insert into Covers, and Expand Cushions
- Unpack the Cushions:Carefully remove the cushions from their packaging using scissors or a utility knife. Take care not to damage the cushions during this process.
- Initial Inspection:Upon unpacking, the cushions may appear flat or compressed. This is normal due to the vacuum-sealing process.
- Insert into Cushion Covers:Gently insert each cushion into its respective cover. Ensure the cushions fit snugly and evenly within the covers.
- Identify Cushions and Prepare Furniture:Identify the seat cushions (typically thicker and firmer) and the back cushions (usually softer and more flexible). Prepare your upholstered furniture frame in the desired location.
- Patience is Key:Allow the cushions to expand naturally over a period of 3-4 days. During this time, the foam or filling inside the cushions will slowly regain its original shape and firmness as it absorbs air.
- Avoid Using Force:Do not forcefully manipulate or press down on the cushions to speed up the expansion process. This can damage the cushions or affect their intended shape.
- Fluffing (if needed):After the initial expansion period, gently fluff and manipulate the cushions by hand to help distribute the filling evenly. This can enhance the overall comfort and appearance of the cushions.
- Maintenance Tips:Regular Fluffing: Periodically fluff and rotate the cushions to prevent uneven wear and maintain their shape over time.Avoid Direct Sunlight: To prevent fading and damage to the fabric, avoid placing cushions in direct sunlight for prolonged periods.Follow Manufacturer’s Instructions: Always refer to and follow any specific care instructions provided by the manufacturer to ensure the longevity of your cushions.
Conclusion
Properly assembling, inserting into covers, and allowing air compressed packed cushions to expand over time is essential for ensuring they provide optimal comfort and maintain their appearance in your upholstered furniture. By following these steps and allowing for a 3-4 day expansion period, you can maximize the lifespan and comfort of your cushions. Patience during this process will ensure that your cushions provide long-lasting comfort and aesthetic appeal in your living space.
How Do I Secure My Vanity or Wall-Mounted Bathroom Cabinet to the Wall Studs?
Watch our step-by-step instruction video to help you secure your vanity or wall-mounted cabinet to the wall studs.
Securing a vanity or wall-mounted bathroom cabinet to the wall studs is essential for ensuring its stability and safety. Proper installation will prevent the cabinet from coming loose or falling. Follow these detailed steps to securely mount your bathroom cabinet to the wall studs.
Materials Needed
- Wall-mounted bathroom cabinet
- Stud finder
- Level
- Measuring tape
- Pencil
- Drill
- Screws (typically 2.5 to 3 inches long)
- Screwdriver or power drill with screwdriver bit
- Anchors (if needed)
- Safety goggles
- Helper (optional but recommended)
Steps to Secure the Cabinet
- Locate the Wall Studs:Use a stud finder to locate the wall studs where you want to mount the cabinet. Mark the edges of each stud with a pencil. Typically, studs are 16 inches apart, but this can vary.
- Mark the Mounting Location:Hold the cabinet up to the wall at the desired height. It’s helpful to have a helper for this step. Use a level to ensure the cabinet is straight. Mark the top and bottom of the cabinet on the wall with a pencil.Identify the mounting points on the cabinet (usually pre-drilled holes or brackets) and mark these points on the wall, aligning them with the stud locations.
- Drill Pilot Holes:At each marked mounting point, drill pilot holes into the wall studs. Pilot holes should be slightly smaller than the diameter of the screws you will use. This helps to guide the screws and prevents the wood from splitting.
- Prepare the Cabinet:If the cabinet has a back panel with pre-drilled holes, ensure they align with your pilot holes in the wall. If not, you may need to drill corresponding holes in the cabinet.
- Position the Cabinet:With the help of a partner, hold the cabinet against the wall, aligning the pre-drilled holes or brackets with the pilot holes in the wall.
- Secure the Cabinet to the Wall:Insert screws through the cabinet’s mounting holes into the pilot holes in the wall studs. Use a screwdriver or power drill with a screwdriver bit to drive the screws in securely. Ensure the screws are tight, but avoid overtightening, which can damage the cabinet or wall.
- Check for Level:Once the cabinet is secured, use a level to double-check that it is still straight. Adjust if necessary by loosening the screws slightly and repositioning the cabinet before retightening the screws.
- Final Inspection:
- Give the cabinet a gentle tug to ensure it is firmly secured to the wall. Make sure all screws are tight and the cabinet is stable.
Tips for Best Results
- Use Proper Screws: Ensure you use screws that are long enough to penetrate the wall studs by at least 1.5 inches. This usually means screws that are 2.5 to 3 inches long.
- Safety First: Wear safety goggles when drilling to protect your eyes from debris.
- Weight Considerations: Verify that the wall studs and mounting hardware can support the weight of the cabinet plus its contents.
Conclusion
Securing a wall-mounted bathroom cabinet to wall studs is crucial for safety and functionality. By accurately locating the studs, drilling pilot holes, and using appropriate screws and mounting hardware, you can ensure that your cabinet is securely and safely mounted. Following these detailed steps will help you achieve a stable and well-installed bathroom cabinet.
How Do I Apply the Adhesive to Attach the Basin to the Vanity Base?
Watch our step-by-step instruction video to help you apply the adhesive to attach the basin to the vanity base.
Properly attaching your bathroom sink basin to the vanity base is essential to ensure stability and prevent leaks. Using the right adhesive and following the correct procedure will help achieve a secure and long-lasting bond. Follow these steps to apply the adhesive and attach the basin to the vanity base.
Materials Needed
- Silicone adhesive or caulk (specifically designed for bathroom use)
- Caulking gun
- Rubbing alcohol or mild cleaner
- Clean cloth or paper towels
- Masking tape (optional)
- Basin clips or brackets (if provided)
Steps to Apply the Adhesive
- Preparation:Ensure the vanity base and the bottom of the sink basin are clean and dry. Use rubbing alcohol or a mild cleaner to remove any dust, grease, or debris from both surfaces. This ensures that the adhesive will bond effectively.
- Position the Basin:Place the basin on top of the vanity base to check the fit and alignment. Make sure it sits correctly and aligns with any pre-drilled holes for plumbing. Mark the position with masking tape if necessary, then remove the basin.
- Prepare the Adhesive:Load the silicone adhesive or caulk into the caulking gun. Cut the tip of the adhesive tube at a 45-degree angle to create an opening that matches the desired bead size. Puncture the inner seal if needed.
- Apply the Adhesive:Apply a continuous bead of silicone adhesive around the top edge of the vanity base where the basin will sit. Ensure the bead is even and thick enough to create a strong seal. If the vanity base has a rim or lip, apply the adhesive to this area.
- Attach the Basin:Carefully place the basin onto the adhesive-covered vanity base, aligning it with your previous markings. Press down gently to ensure the basin makes full contact with the adhesive.
- Secure and Set:Apply even pressure around the edges of the basin to ensure a firm bond with the adhesive. If using masking tape, apply it around the edges to hold the basin in place while the adhesive sets.
- Clean Excess Adhesive:Wipe away any excess adhesive that oozes out from under the basin using a clean cloth or paper towel. Dampen the cloth with rubbing alcohol if necessary for easier cleanup.
- Allow to Cure:Allow the adhesive to cure according to the manufacturer’s instructions. This usually takes 24 hours, but curing times can vary. Avoid using the sink during this time to ensure a strong bond.
- Final Inspection:Once the adhesive has fully cured, inspect the bond to ensure the basin is securely attached to the vanity base. Check for any gaps or loose areas and apply additional adhesive if necessary.
Tips for Best Results
- Use Quality Adhesive: Choose a high-quality silicone adhesive or caulk designed for bathroom use. These products are water-resistant and provide a strong, flexible bond.
- Even Application: Ensure the adhesive bead is applied evenly to avoid gaps and ensure a secure seal.
- Follow Manufacturer’s Instructions: Adhere to the adhesive manufacturer’s guidelines for application and curing times to achieve the best results.
- Temperature Considerations: Perform the installation in a temperature-controlled environment. Extreme temperatures can affect the adhesive’s performance.
Conclusion
Attaching your bathroom sink basin to the vanity base with adhesive requires careful preparation and attention to detail. By using the right materials and following these steps, you can ensure a secure and long-lasting bond. Proper application and curing of the adhesive will help prevent leaks and maintain the stability of your sink basin, contributing to a well-functioning and attractive bathroom.
Video Library
Watch step-by-step videos to help you assemble, care for, and get the most out of your Bush Home furniture.
Explore the Bush Home YouTube channel for assembly tutorials, product highlights, setup tips, and inspiration for every room in your home.
View YouTube Channel
How to install KD Cam Bolts and Cam Locks
Watch our step-by-step instruction video to help you properly Tighten the KD Cams.
How to adjust drawer fronts
Watch our step-by-step instruction video to help you adjust the door hinges.
How to adjust door hinges
Watch our step-by-step instruction video to help you adjust the door hinges.
How to separate drawer slides
Watch our step-by-step instruction video to help you separate and install the drawer slides.
How to clean furniture
Watch our step-by-step instruction video here.
How to use the USB Port
Watch our helpful instruction video to learn how to properly use the USB Port.
How to attach wall mounted cabinets
Watch our step-by-step instruction video to help you secure your vanity or wall-mounted cabinet to the wall studs.

Whole Home Harmony

Family First Design

Reliable Support